Monday, January 30, 2012

Ode to Button


 There once was a small, oval button
Lost among its larger, shiny cousins
together in a tin
its chances seemed rather slim
to be ever discovered.


Until one day a jeweler came along
pawing through the tin
of buttons: brass, bakelite, and bone,
looking for a button so rare
to set in a ring and to the world share.


That button she found covered in grime
surrounded by its brethren
meant to outshine.

The jeweler cleaned and buffed
this sweet oval shell
back to its glory
when all was well.

No longer on a shirt or in a tin
this beauty's life is 
just about
to begin.


Wednesday, January 25, 2012

What the Heck is This?


I've been plowing through this little studio of mine attempting to clean, organize, and de-stash.  Of course, I'm tackling the clutter between filling some orders and making inventory for this year's shows.  So, when the work is in the pickle, I'm poking through bins and boxes.

I just found this in the "nature box" along with halved spiky peach pits (saving these to set in a necklace... someday), sponges, stones, fur, and the odd bone or two.  As I recall, my father found a few of these floating in the Hudson River.  He brought these home and presented them to his girls some 30 years ago.  I can't believe that I have hung onto this for that long.  Wow.


So, what is it?  I have no bleeping idea.  A seed pod would be my first guess.  But from what tree?  My second guess would be a shrunken alien head.  If you know what this is, please enlighten this puzzled gal.

Happy Wednesday!

Friday, January 20, 2012

Favorite Tools


I love to set stones.  And buttons.  And rusty washers.  I love to set pretty much anything that you can wrap a bezel around.  

Sterling silver bezels are good.  Fine silver bezels are better.  22k gold bezels rock my world.  Buttery and forgiving, gold in this high carat form takes the frustration out of stone setting and makes it an absolute joy.


Having the proper setting tools aids in the joyful task.  Tool companies sell several types of tools for prong and bezel setting  (fyi: I don't do prongs.  I can do prongs, but I'd rather not.  So I don't).  The choices can be confusing and expensive.  All a jeweler needs is this tool above.  
A simple burnisher. 

 Burnishers are rather useful tools at the bench.  No buffing machine one hand, you say?  Polish with the burnisher.  Not happy with the stone in that setting?  Gently loosen the bezel (or prongs) with the sharp edge of the burnish.  Just scraped the surface of that pendant?  Use the burnished to push metal over the mar.   I learned how to bezel set with that very tool some 20+ years ago.  I still use it everyday.


I loved my burnisher to compress those bezels and lock the stone in place.  That is until I started to bezel set really small, teensy weensy little stones.  The burnisher could still do the job, but the small bezels looked rather messy.  The tool was sadly too big for the task at hand.


 While poking around in a tool catalog, I spotted this nifty little chigger.  Consisting of highly polished, concave punches and a super comfortable handle, this tool can set stones in either prongs (gasp!) or round bezels to a maximum of about 8mm.  The finished look is bright, clean, and professional.  And it is very, very easy to use on either round tube or seamed bezels.


There you have it.... two of my favorite bezel setting tools.  
So, I'm curious, dear blog followers, what is your favorite tool?


Wednesday, January 18, 2012

Making Ingots and Stinking at It

 I have mounds, tubs, and drawers full of silver scraps in all shapes and forms.  Dust, filings, spirals, corners, wire, failed projects..... I want to reuse my scrap and make fresh stock from it.


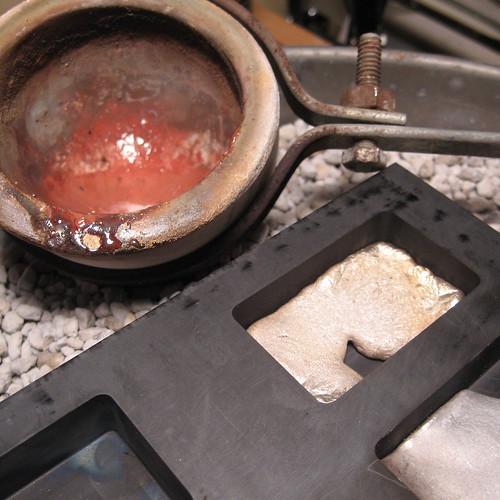
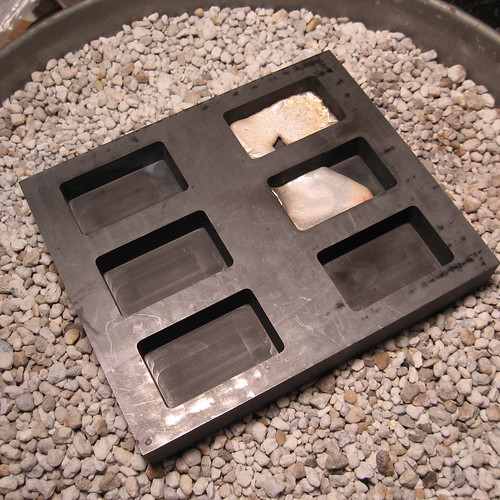
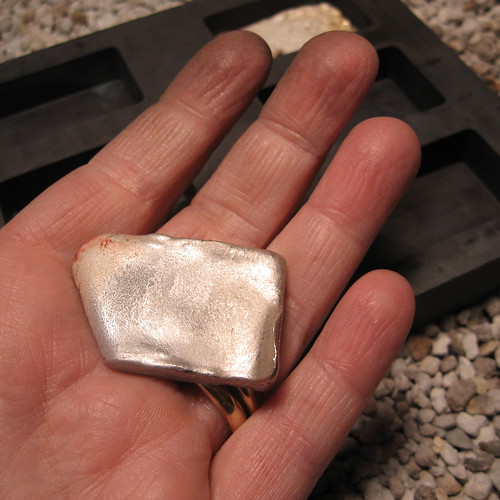
I just got this nifty graphite ingot mold.  Each compartment will hold 5 ounces (or was it 10?) of silver.  So after a few trial runs and many more needed, I produced one somewhat useable ingot.  I think I need more practice.  And oxygen for my torch.

Here's what I learned:

1.  Make sure the mold is ripping hot before you pour.  As soon as the molten silver hits cold graphite , it shrieks and promptly cools. Ok, it doesn't shriek, but imagine what you would do if you jumped into the north Atlantic Ocean in February. See?  Shriek. If not poured into a hot mold, the ingot in question will not be lovely and solid, but a disastrous mess of folds, pits, and air bubbles.  I should have known this.  I've poured into iron molds many a time and I always, always, always get the mold smoking hot right before I pour (and it is really smoking 'cause the oil on the irons surface begins to burn away.... and the oil is there to keep the molten metal from sticking to the mold).

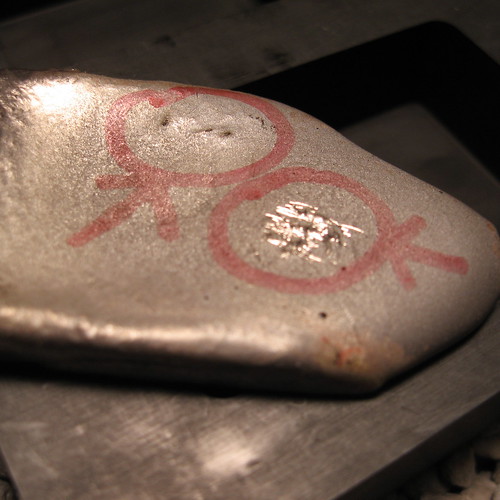
2.  Make darn sure that there are not any foreign objects in your scrap before you melt.  When I say foreign, I mostly mean steel or iron.  Check out the image above.  I circled what appears to be a chain popping out of the surface.  I actually saw the chain floating around in the molten silver and honestly tried to fish it out with a pick.  I'll have to melt this down and try again.


3.  Be set up (that is, have enough scrap on hand) to pour more than once.  Nothing gets a mold nice and hot than a fresh pour.  Use this to your advantage.

4.  Weigh out your metal as to have enough to pour a decent sized ingot.  I did not do this.  The image above shows a so-so pour.  If I had more metal rolling around in the crucible, the ingot would have filled nicely to the sides of the mold.

5.  Lastly, make sure that your studio is properly exhausted or get a big fan going and open a window.  And be warned, your smoke detector will go off.  And warn your family that the detector just may go off.  Warn them especially if they are all in bed because it's an ugly scene otherwise.

Happy pouring!

Tuesday, January 17, 2012

Return of Quench

 Hey there.  It's been a while, hasn't it?

 I'm pledging to blog more this year ( and lose weight, relax more, do less shows, etc).  Last year was stressful and chaotic.  Way too much going on.  So, blogging got axed.

Stay tuned for lots of work in progress reports, new pieces revealings, and studio shenanigans.